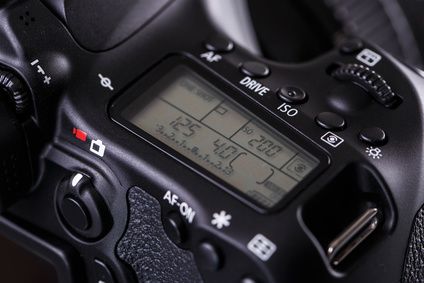
Improve Your Photography By Learning Some Of Your Camera Settings
 It has been a while since I have written a post on camera settings. This is definitely the first one for 2016 and it’s already April.
If you own a DSLR or a mirrorless camera, you should learn about AV, TV and Manual mode and not just stay stuck on auto mode all the time. By learning to use the other 3 core settings properly, you can be in more control than the camera and you can improve your photography.
I’m going to save “manual” mode for last since just saying the word may frighten many of you reading this post.
“TV” Mode – “Shutter Priority” – Out of the 3 modes (AV, TV and Manual), this is the one that I use the least. The photographer chooses the “Shutter Speed” (1/100th, 1/500th, 1/2000th, etc.) and the camera sets the aperture automatically (lens opening f/4, f/5.6, f/8, etc.). This mode would be used more when shutter speed is a concern but the aperture is not important. This mode would likely be more for outside use than inside use. The shutter speed selections will also be influenced by the ISO settings (light sensitivity). For many that remember the film days, ISO refers to 100, 200, 400 and 800+ if that helps. The best thing to do is turn the dial on your camera to TV and start testing shooting. The nice thing about digital is that you can see your results immediately.
“AV” Mode – “Aperture Priority” is usually the mode that I use the most outside as a people photographer. In this mode, the photographer sets the aperture (lens opening f/4, f/5.6, f/8, etc.) and the camera sets the shutter speed. Just like in TV Mode, the ISO setting influences how all this works together. One great use of AV Mode is controlling the depth of field (how out of focus or in focus the background behind the subject is). I often set my lens to WIDE OPEN which in the case of my 70-200mm is f/2.8. If your lens only goes to f/4 or f/5.6 when wide open, then set it to that and start shooting. The best thing to do is turn the dial on your camera to AV and start testing shooting. The nice thing about digital is that you can see your results immediately.
“M” MANUAL MODE – This is a the most dreaded mode for most “new” photographers. It’s likely because the photographer is in complete control of the “Shutter Speed” (1/100th, 1/500th, 1/2000th, etc.) and the “Aperture” (lens opening f/4, f/5.6, f/8, etc.). I’ll help relieve some stress by this next statement: “Manual Mode” is “NOT”… I repeat “NOT” always the best mode to shoot in. Yes, I love manual mode and use it often. However, I mainly use it for inside shooting. For example, I may mount a flash on my hotshoe, set the aperture to f/8 or so, set the ISO (light sensitivity) to a higher setting like 800 and choose the shutter speed that I would like which may be 1/60th in a lower light setting or 1/125th plus with studio strobes and shoot away. I could easily double the length of this post by going deeper into manual mode, but for now, my challenge to you is to try manual mode inside like the example I gave. The best thing to do is turn the dial on your camera to “M” (manual mode) and start testing shooting. The nice thing about digital is that you can see your results immediately.
David Williams
Latest posts by David Williams (see all)
- 5 Signs You’re Hiring the Wrong Photographer for Your Business - April 9, 2025
- How Will AI Change Professional Photography? - February 2, 2025
- Family Photographers vs. Commercial Photographers: Exploring the Differences in Approach, Purpose, and Technique - February 2, 2025
- Black and White Film Shot Of Our Golden Retriever: Trigger - February 2, 2022
- North Carolina Snow Images Shot In Franklin County - January 22, 2022


